
A few months ago I decided it was time to invest in a custom eyeshadow palette. A palette I would use daily and never get bored of.
I came to this conclusion after buying endless budget to mid-priced eyeshadow palettes (think Makeup Revolution, Sleek, theBalm etc) which although initially loving, they would ultimately end up at the back of a drawer. Not savvy!
Don't get me wrong, I still have pre-made palette I absolutely love, mainly my Urban Decay Naked Ultimate Basics and Zoeva eyeshadow palettes. But fast forward a few months after creating my custom eyeshadow palette and I'm still cherishing every eyeshadow in it and know it will be a favourite for years to come.
Which is why I thought I would detail how I was able to create a custom eyeshadow palette I now use every time I apply makeup and is also something very travel-friendly and versatile. Below you will find all you need to establish what you are looking for in an eyeshadow palette and how best to go about it.

Deciding on a palette brand & size
To start, you need your base product; an empty eyeshadow palette. This can be a Z Palette (a pretty popular choice) which can fit any size pan eyeshadows into, even de-potted pans from compacts you already own (Z palettes are magnetic) or a MAC Pro Palette. I personally went for a Z Palette because they're more versatile, but MAC palettes do look sleek & are more durable as they're made from plastic. There are other options from various brands but these are the most popular choices and will fit most eyeshadow pans. Next, you want to think about how many eyeshadows you want. This is all dependant on how many you feel you will use, what you want the palette for, and cost, seeing as you will be buying all the eyeshadow pans individually. Z Palettes start at £5.50 HERE for a compact that stores 3 pans and goes up to a 35 pan palette for £22.50 HERE. MAC palettes start at £8.00 HERE for a 4-pan palette and go up to a 30-pan double sized palette HERE, including additional insert.
I decided a small Z Palette £9.50 HERE (holds 9 eyeshadows) would be the best option for me, especially as it was my first custom palette and I already have a fairly large stash of eyeshadows palettes. This is a good starting point for most, unless you are a budding makeup artist or you own very few eyeshadows. I feel any more than 9 -15 pans could result in eyeshadows not being used and will be more expensive to fill.
Eyeshadow pan options
Deciding on which brand of eyeshadows to go for, though you may want a mix, can be daunting! Prices vary per brand but the key brands with impressive pigmentation and formulas are Makeup Geek, KIKO, Morphe, Coloured Raine and MAC. MAC being the most expensive per pan at £10.00 - £13.00 and Morphe the cheapest at £4.50 per pan. After looking at a lot of swatches online I decided to create an exclusively Makeup Geek eyeshadow palette due to the more than impressive pigmentation and shade range (see swatches below!). You can find Makeup Geek eyeshadows at Beauty Bay HERE.

Establishing your favourite eyeshadow shades
Building your eyeshadow palette is the fun part! I decided to put mine together over two months with two separate orders as I wanted a few Makeup Geek Foil Eyeshadows and them babies are £9.25 each, not exactly cheap! Which was probably for the best as I knew exactly what I wanted come my 2nd order. Taking your time to decided how you want to fill your palette is important especially if you want to build something you will use for years.
When deciding what finishes and shades to go for I would highly recommend looking at which eyeshadow you already use the most and then also think about shades that are slightly out of your comfort zone but not overly so. I knew from loving the matte warm tones in the UD Naked Ultimate Basics Palette that I wanted mainly warm matte shadows, and from seeing Makeup Geek swatches online some crazy pigmented foil eyeshadows as well. A mix of mattes, shimmer/frost and foil eyeshadows works really well.
Make it multipurpose
To get the most out of your eyeshadow palette you really want to make it versatile. Opting for a matte brown that matches your eyebrows means you have something to fill in your brows with and use in the eye crease and bottom lash line. I'd also recommend going for a highlight shade that will work on the lids and inner corners of the eyes but can also be used as a highlight under the brows and on the cheekbones. For me this is Makeup Geek Shimma Shimma, which is now one of my favourite highlighters as it's so intensely pigmented! Another shade you may want to include in your palette is a carbon black, a touch can be used for a smokey eye or along the upper lash line or even applied as eye liner on a damp angled liner brush.

Makeup Geek Standard Eyeshadow Pans £6 HERE | Foiled Eyeshadow Pans £9.25 HERE (side note: 'Flame Thrower' is unreal?!)
Arranging your custom palette
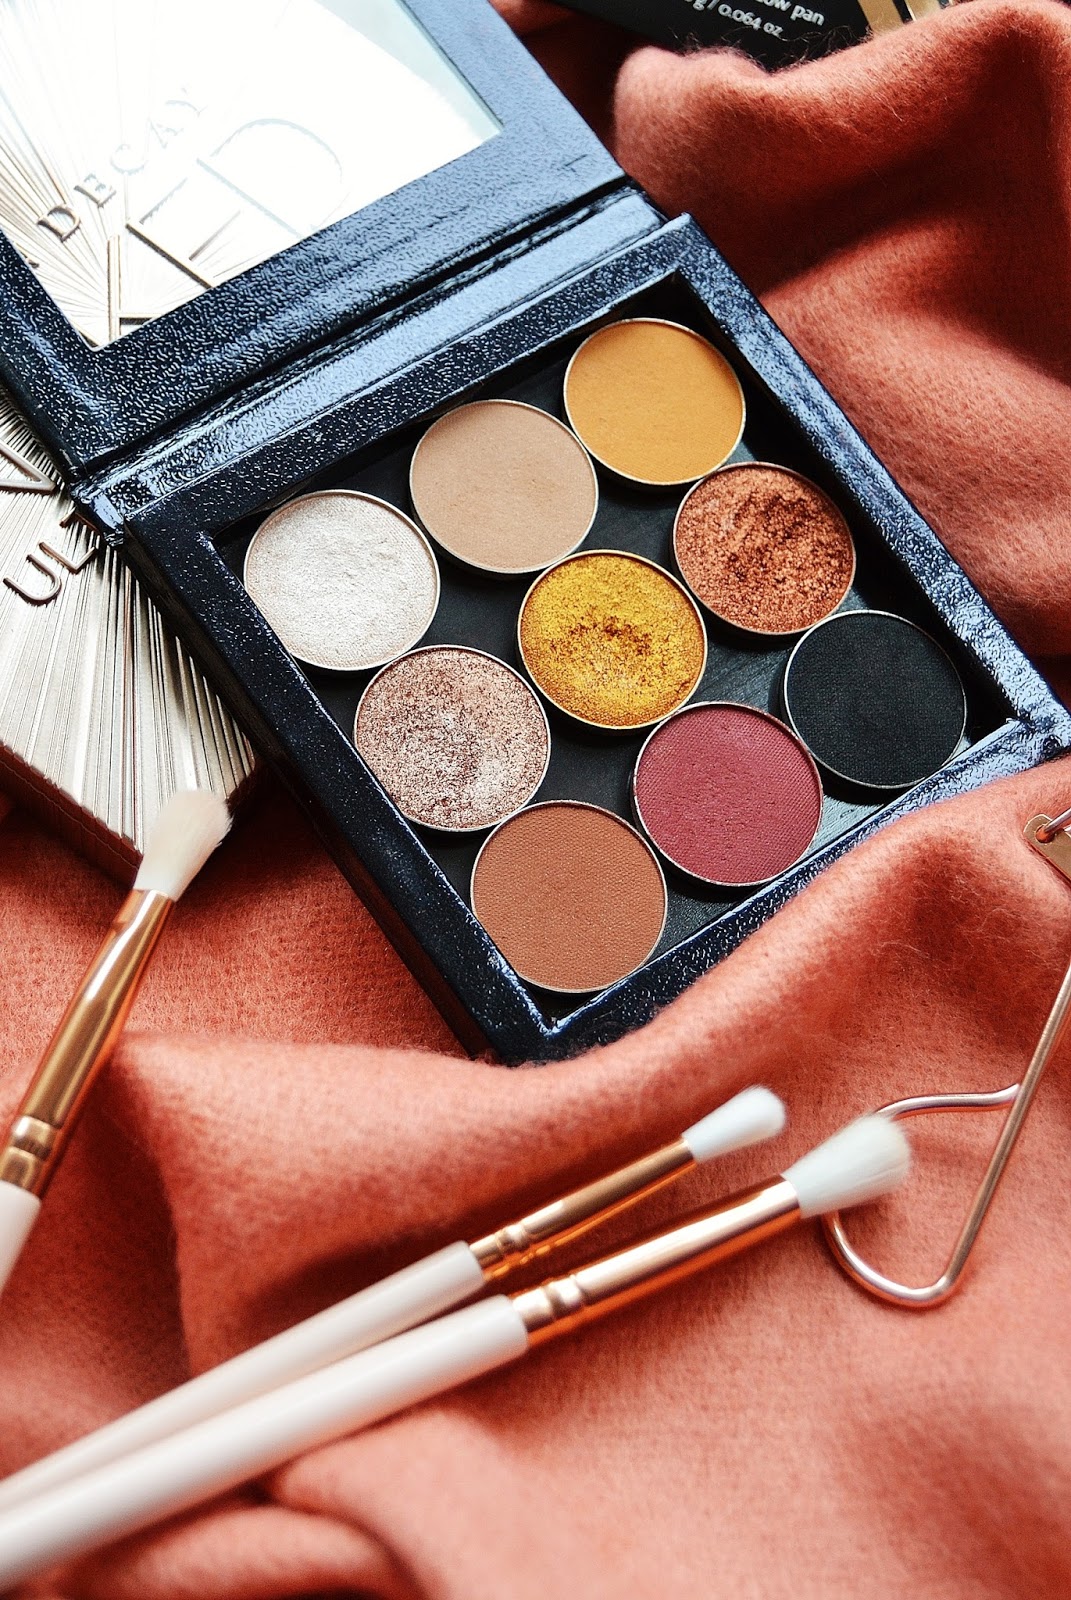
This definitely isn't an essential to building your own eyeshadow palette but it's a nice finishing touch that makes it truly your own. You may want to line up all your matte together and then your shimmer/foil shades or you may want to set out your palette in rows of eyeshadows that work well together to add ease to your morning makeup routine. As you can see I went from light to dark with my palette with 3 foiled eyeshadows filling the middle row, which works perfectly for me.
Hopefully, I've covered everything here and you are set to create a tailored palette of your dreams!
Full swatches of all my Makeup Geek eyeshadow collection to come soon.
Fee xo.