
If you're a fellow blogger then you're probably struggling with the lack of light right now and I totally feel your pain! Taking hundreds of images only to discover they are too blurry and dark to use is the worst. But never fear there are more than a few ways to improve your photography and produce bright images even on the dullest of days.
Here are my top 5 tips to do just that!
Shoot your images when the sun is at it's brightest - 12pm-1pm in the UK
Technically the sun is always at it's brightest and it's the weather that determines how visible the sun is in the sky. But on a typical overcast Winter's day the sky should be at it's brightest around 12pm-1pm so that would be your time to get taking photos, of course near a window for the maximum amount of natural light. My key tips here would be to turn off all the lights in the room and turn off the flash on your camera as neither will do your images any favours.
Use equipment
Using photography equipment can help you shot your images in so many different ways, especially in bad lighting conditions and it doesn't have to cost a bomb. I'd personally recommend first buying a basic tripod to keep your camera still when taking your photos and if you still find your camera shakes when you press the button to take your images then a Remote Shutter Release will sort out the problem, you can expect to find both items for under £10. As for lighting you can invest here if you wish but I'd suggest keeping it portable and inexpensive to begin with to see how you get on. A great portable option for your camera is a LED Ring Flash Light (£22.49 - eBay here) that will fit around your camera lens and illuminate your images. Or you can opt for two lamps either side of your setup with high watt daylight bulbs as another portable option that doesn't require too much setup time.
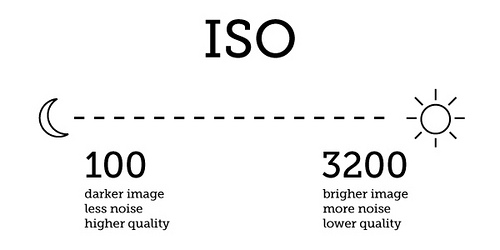
Set the ISO number according to your lighting conditions
Most cameras have have an ISO setting, even digital cameras, and it's more than easy to keep it set to 'auto'. However on dull days setting the ISO to a higher number can do wonders for how bright your images will turn out. Anywhere from 400-800 won't compromise photo quality/add grain and can really brighten overall images. However a steady hand or tripod may be needed!
Bounce the light onto your setup
When shooting in dull lighting conditions you can find parts of your setup to be darker than others or in shadow which even in post-editing can be a pain to correct. So the best time to tackle these issue is when shooting and the best way to bounce natural light back onto your setup is to use a reflector. This is basically a reflective surface that will bounce natural light straight onto your setup just where you require it. You can find my own DIY reflector, made from tin foil and a ring binder here, or you can opt for something more professional with a large collapsible reflector (£6.95 - eBay here) that will do the job even better and can be used in self portraits for makeup looks as well.
Use photo-editing software to get the most out of your images
Lastly I cannot stress how important photo editing can be for the overall look of your photos... though I'm sure you already know this as a blogger! So getting to grips with your photo editing software or upping your game and investing in Photoshop is a must. With all my images in Winter I up the colour temperature, brightness, contrast and if the image isn't as crisp as I'd like I use the sharpening tool. If you are looking for a better photo editing program than what you are using I highly recommend PhotoScape which you can find on CNet here... for free! But if you want to get to grips with Photoshop then From Roses has an amazing introduction to it here.
Hopefully my tips have been helpful and fingers crossed Spring comes early this year!
Fee xo.